After you have been added as an OISS Connect department user, you can set up your account by saving the following information related to your department:
- Your title
- Contact information
- J-1 Site of Activity (physical work locations for your department)
Once saved, this information will be auto-filled, or available from a drop-down, when making future requests in OISS Connect.
Step 1: Navigate to ‘Departmental Configurations’
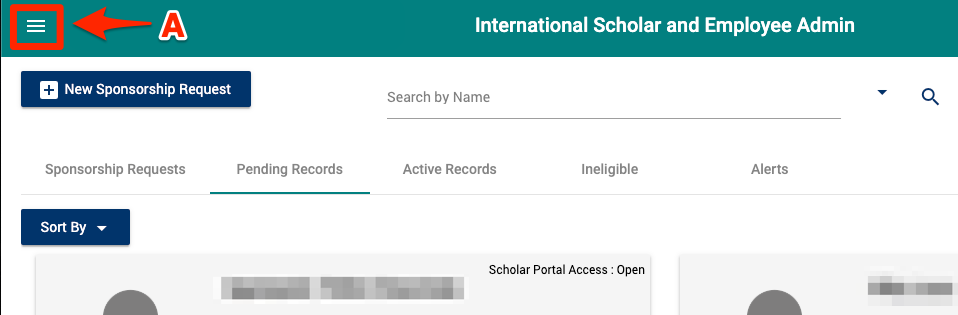
A. Click on the three horizontal lines, or 'stack icon', at the top left of the window. ![]()

B. Select ‘Departmental Configurations’.
Step 2: Add Your Title and Contact Information
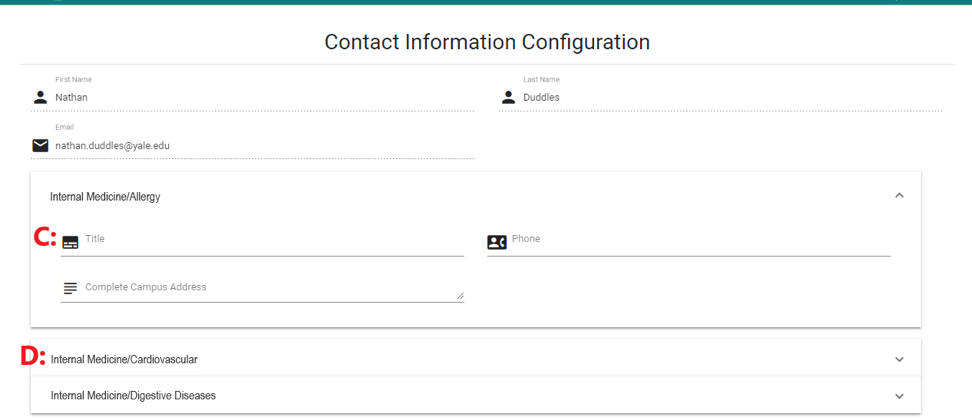
C. Enter your title, phone number, and physical campus address.
D. If you represent multiple departments, click each department name. Otherwise skip.
Step 3: Add ‘Site of Activity Information'
Site of Activity is the physical work location/s.
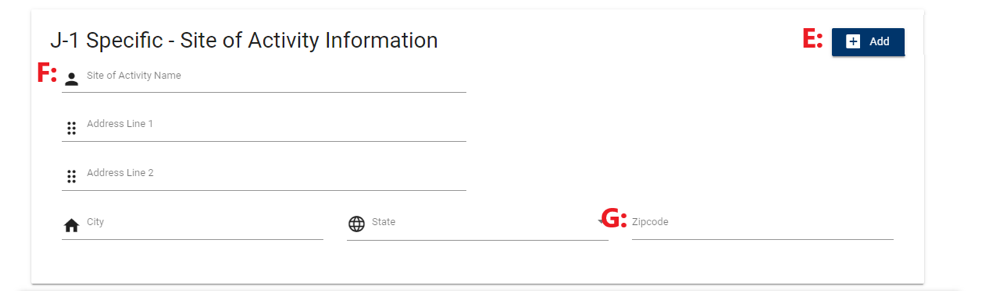
E. Click the Add button ![]() at the top right to create a new 'Site of Activity' template, which can be added to J-1 sponsorship requests. Some departments have many different sites and you can add as many as you like as templates.
at the top right to create a new 'Site of Activity' template, which can be added to J-1 sponsorship requests. Some departments have many different sites and you can add as many as you like as templates.
F. Enter the name of the site (e.g. 'Kline Geology Lab') and the physical, not mailing, address.
G. Be sure to enter the ZIP Code for the physical (e.g. 06510), and not mailing (e.g. 06520), address.
Step 4: Save Your Changes

H. Click on the Update or Save button  at the bottom right to save the changes you made on this page. You may see either one.