This is a guide for department administrators on what documents OISS requires for J-1 sponsorship requests, and how to upload them to OISS Connect.
Important Notes
Click Upload
![]()
OISS Connect does not automatically upload files as you add them using the Browse button or dropping them into the browse area. You must click the blue Upload button at the bottom of the page to upload the files.
Deleting Files
Departments cannot delete files that were uploaded erroneously. Please do not click on the minus button ![]() to ‘Reject’ a document. This will notify the scholar that a document has been rejected, which can cause confusion.
to ‘Reject’ a document. This will notify the scholar that a document has been rejected, which can cause confusion.
We recommend you leave the documents as they are unless there is confidential information you need expunged. In that case please contact your OISS adviser.
Before You Begin
The host department will need the following required documents to complete this section:
- If the evidence for English proficiency is via interview or English Language test upload the English Language Assessment Form
- If the scholar is a Postgrad Associate/Fellow, Visiting Fellow, Laboratory Associate or Visiting Faculty upload the OPDA approved Appointment Application
- A copy of the passport bio page (can be uploaded by either the department or scholar)
- CV (can be uploaded by either the department or scholar)
- Child and Spouse passports if requesting J-2 dependent status(can be uploaded by either the department or scholar)
- If the scholar is a J-1 Student Intern upload these additional documents:
- Intern: EHS email confirmation
- Home Institution Certification
- OISS Intern Data Collection Form
- Proof health insurance (can be uploaded by either the department or scholar)
If the scholar was previously on a J-1 visa, upload:
- Previous J-1 DS-2019s
- Two-year home residence requirement waiver/application (if acquired)
- Current Institution Transfer Form (if transferring J-1 status to Yale)
Step 1: Prepare Files for Upload
Combine same-type documents into one file.
Instructions:
Give the file a descriptive name on your computer before uploading to OISS Connect. Name the document file based on the content. For example, 'EAD Card Scan.pdf' or 'OPA approval.pdf'.
Documents Not in PDF Format?
If your document(s) are not in PDF format, please follow these directions to convert them before uploading to OISS Connect.
Step 2: Reopen Scholar Record
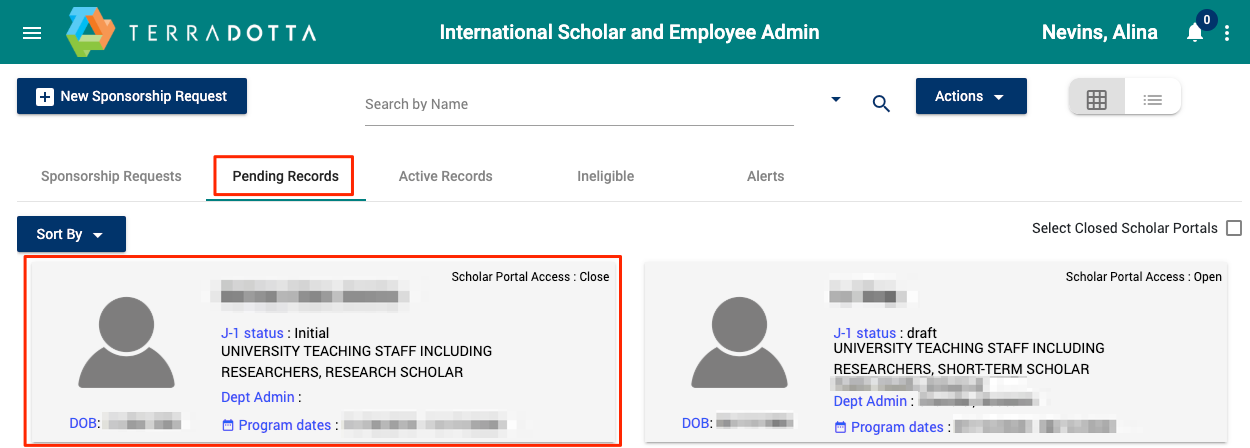
In the Dashboard, in the 'Pending Records' tab, click on the scholar’s record to re-open the request.
Step 3: Go to 'Documents' Tab
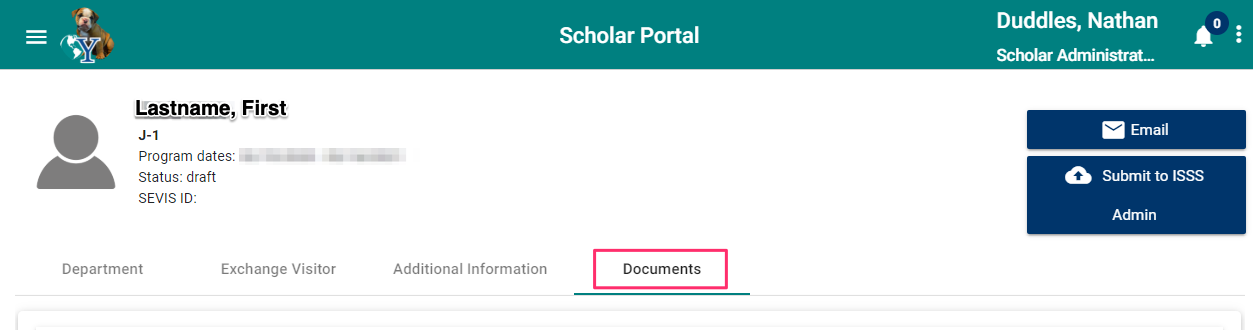
Click the 'Documents' tab at the top of the scholar record.
Step 4: Click 'Required Documents' Section

On the left side of the screen, select the 'Required Documents' section.
Step 5: Drop or Browse for Files
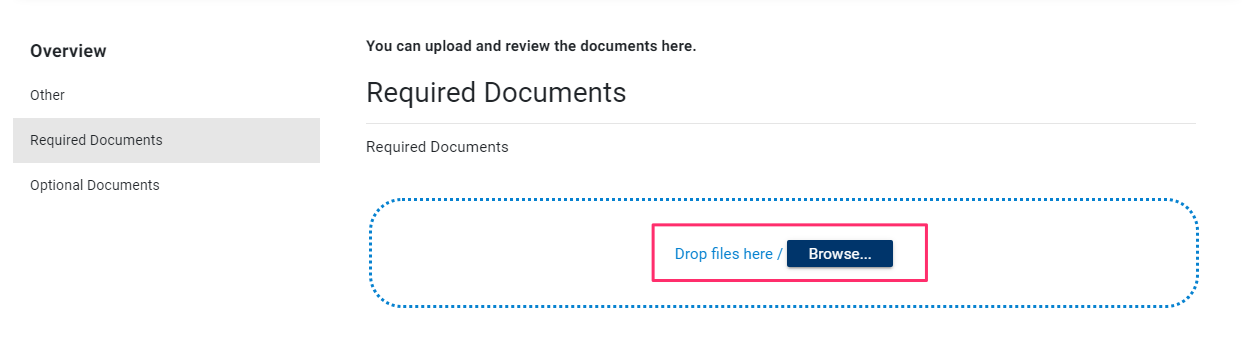
Upload files here by clicking the Browse… button or dragging and dropping a file in this space. Multiple files may be added at the same time.
Documents mistakenly added can be removed by clicking the trashcan icon ![]() .
.
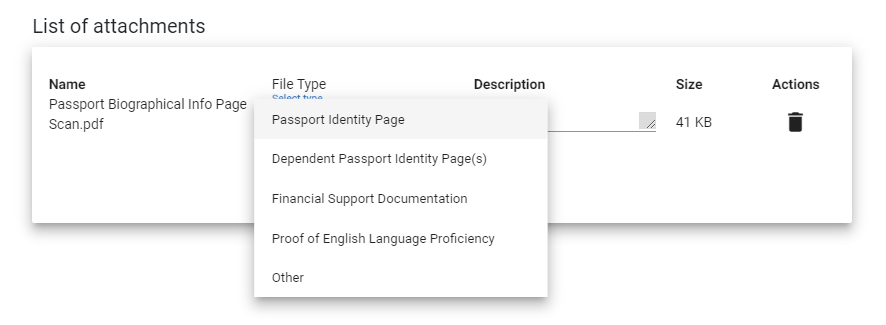
Step 6: Select File Type
Step 7: Click Upload
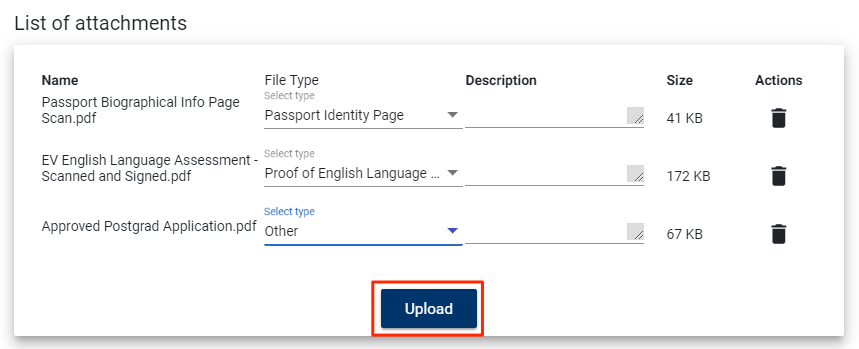
Click the Upload button at the bottom to save documents to the record.
Step 8: Review Uploaded Documents
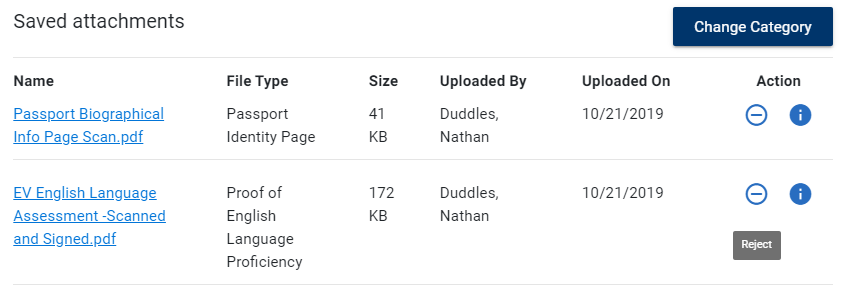
Currently, it is not possible to delete documents once uploaded. Please do not click on the minus button ![]() to ‘Reject’ a document, as this will automatically send an email to the scholar.
to ‘Reject’ a document, as this will automatically send an email to the scholar.
If you need to change the File Type of an uploaded document, you can do this by clicking on the Change Category button.