The New Sponsorship Request Form (NSR) is used to create the initial OISS Connect record for:
- J-1 Research Scholars and Short-Term Scholars
- J-1 Student Interns
- First time H-1B at Yale (new hires or current employees on another visa)
- New F-1 OPT, STEM OPT, TN, and non-Yale J-1 (JO) employees
When you have all the required approvals, you can initiate the New Sponsorship Request process with OISS. You will need the information listed below.
- Appointment Title
- Appointment Start and End Dates
- Scholar's name, email, and date of birth
- Evidence of scholar's work authorization, if applicable (eg F-1 OPT, J-2, etc.)
If you are requesting J-1 Student Intern status for a Visiting Undergraduate Participating in Research or Clinical Activities there are additional requirements.
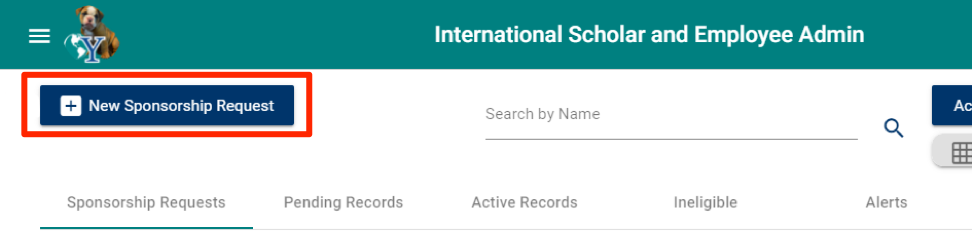
Step 1: Create a 'New Sponsorship Request'
After logging into OISS Connect, click on the + New Sponsorship Request button at the top left:
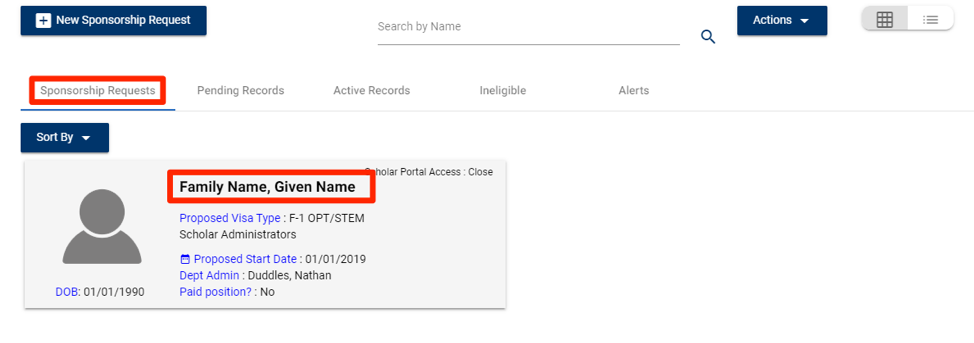
Step 2: Search Scholar Name and Email

A: To see if the scholar is already in our database, enter their personal email address and click the right-side magnifier icon to search. If no results are returned, click ‘OK’ and try again with their Yale email (if created). If the scholar is found, double-click on their name to populate fields B through C. If they are not found, fill out B and C as follows.
B: Enter scholar’s permanent email address. Use the scholar's Yale email address if known, otherwise use their personal email address, not a temporary employer or university email address.
C: Enter scholar’s Family Name and Given Name. If you have a copy of the scholar's passport, enter names as they appear in the passport MRZ.
Name Requirements
The name in the OISS Connect record must match the name in the Machine Readable Zone (MRZ)on the passport.

Punctuation and Special Characters
The record cannot contain special characters such as hyphens, apostrophes, or diacritical marks.
- If the passport lists their name with these characters, the department should remove them and make sure the name matches the passport MRZ.
Step 3: Enter Appointment Information
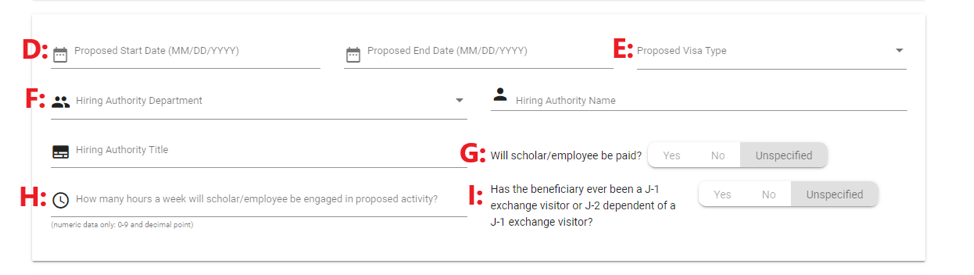
D: Enter Proposed Start and End Date in MM/DD/YYYY format.
E: If known, select Visa Type from drop down menu - “J-1”, “H-1B”, “F-1 OPT/STEM” (use for any OPT or non-Yale sponsored visa status, as well as for F-1 CPT), “JO” (use for J-1 Academic Training or Non-Yale sponsored J-1, e.g. Fulbright), etc.
F: Select Hiring Authority and enter name of Supervising Faculty or PI.
G: If scholar will be paid by Yale, click Yes. If not, click No. If not yet determined, click Unspecified.
H: Enter hours per week for appointment (e.g. 40, 37.5).
I: Leave as Unspecified. OISS will later collect this information from the scholar.
Step 4: F-1 OPT/STEM (or other Employment Authorization Documents / EAD)
This section only appears if 'F-1 OPT/STEM' was chosen for Proposed Visa Type (E).

J: If on OPT, enter I-20 dates above.
K: Enter start and end date of the scholar’s work authorization (found on EAD card, on I-20 for CPT, or on DS-2019 for AT).
Step 5: Scholar's Biographical Details

L: Only Date of Birth is Required: Be aware that the scholar's passport may list the DOB with the day first. You must enter it in MM/DD/YYYY format here.
Step 6: Enter Department Contact Information

M: Select scholar’s Host Department.
N: Select your name from the dropdown and fill in your Phone, Email and Campus Address. In the future, these fields will populate based on the selected Contact Name as entered on your Departmental Configuration page.
Step 7: Enter Appointment Title
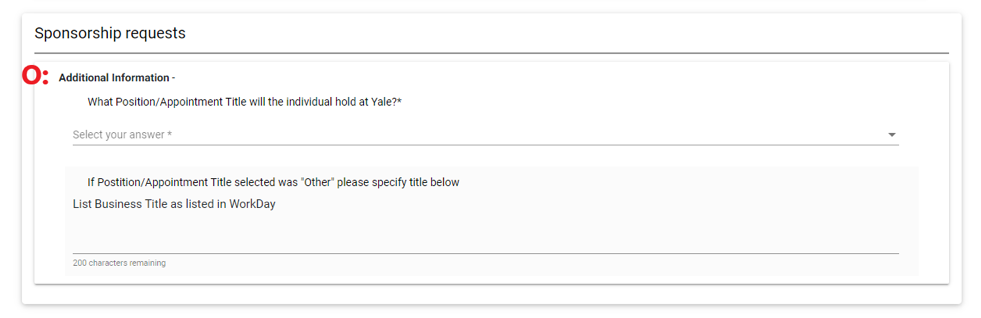
O: Enter scholar’s Appointment Title.
Step 8: Review and Submit Record

P: Check to make sure all information is correct and complete then click the Submit button at the bottom right.
Step 9: If F-1 OPT, Please Upload Documents
Immediately after submitting the New Sponsorship Request for F-1 OPT/EAD, please re-open the scholar card, go to the Documents tab and upload the following documents:
-
Form I-20 with OPT recommendation
- Employment Authorization (EAD) card
- Passport ID page
Next Steps
Once all required information and documentation has been submitted, OISS will review the request and contact you with any questions.
When OISS approves the new sponsorship request, OISS Connect will automatically notify the 'Department Contact' listed in the New Sponsorship Request via email. OISS Connect will also email the scholar an invitation to create an account and access their record.
J-1 Scholars: Next Steps
H-1B: Next Steps
Once OISS accepts the submitted NSR for an H-1B , your OISS adviser will email both the department and the prospective H-1B employee with next-step instructions. This will include access to a cloud folder for you to upload the required documents. OISS Connect is not used to submit and collect the required documents.